Fixing mistakes
I’ve mentioned in a few comments there are now getting to be a number of repairs that are needed on parts of the substructure. With a bit of luck what I’ve learnt may help anyone else that ends up with similar issues in the future, or feel free to tell me where I’ve gone wrong!
Problem
They fall into 2 categories – damage after the works and incorrect procedure resulting in remedial action. There are a number of causes for both starting to happen in my opinion. Initially there was a big push to get productivity up, then there was the need to reduce costs. This started with reducing the numbers on site and we are now in the situation of reducing hours for some of the work groups. This means moving people about the site and workers jumping from one crew to another. This leads to procedures not being followed and a new learning period if the crew changes and the new bloke gets left to stay back and finish off the pour. However I digress.
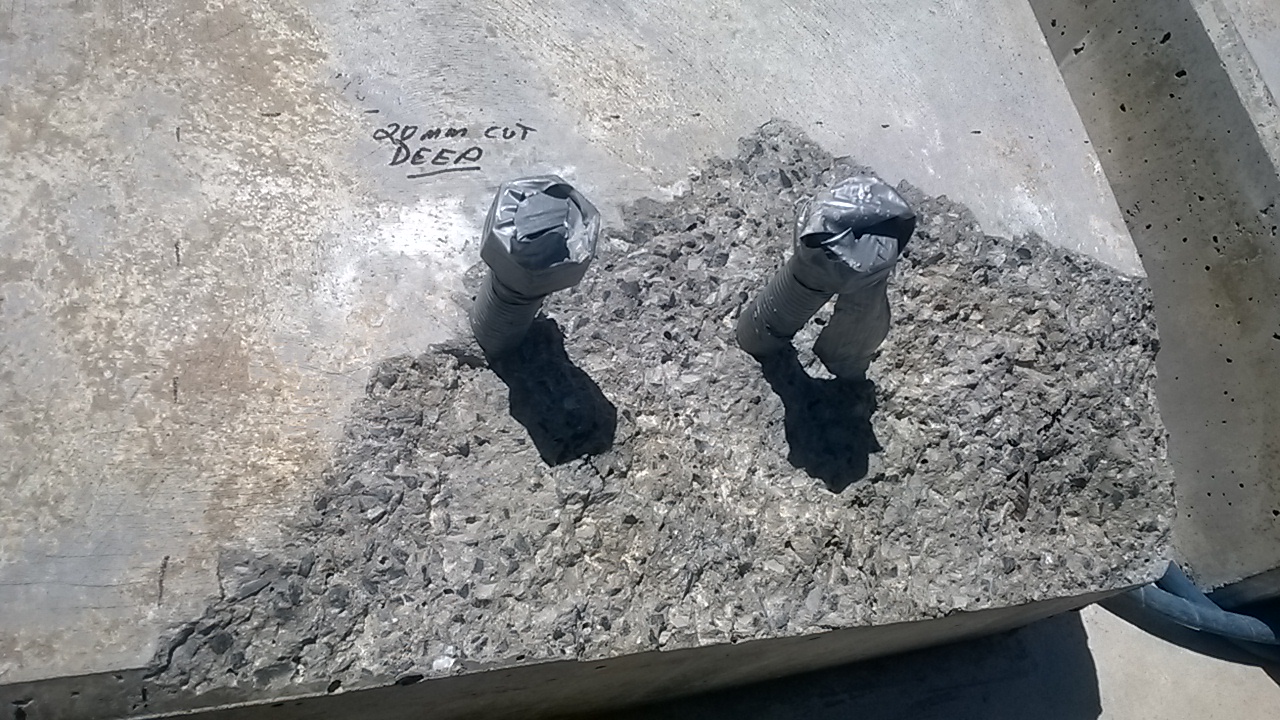
The photo below shows the damage done to one of the pedestals on pier 10. The workers that stripped the formwork said nothing about it happening, and the concrete that broke off is sound, as is the concrete remaining on the pedestal. The formwork could have been removed at an angle, or there could have been a lack of form oil on those sides. I think the most likely cause is that a sledgehammer was used to help persuade the forms off, not that anyone is owning up to that.

Solution
To fix the problem the concure had to be removed, which proved much more difficult than first thought. Most curing membranes on the approved list for transport and Main Roads degrade after a period of 6 to 8 weeks (normally under UV light). However trying to remove the membrane before this isn’t that easy. High pressure water blasting isn’t effective. There are a lot of environmental controls involved with sand blasting (not to mention the cost involved). That only leave mechanical removal, or in this case a man scrubbing it off with a scouring pad fitted to a buffer. The cost of this work now, however is preferable to doing the rework later in the program (after 6-8 weeks) as the girders will have been landed and cross girders poured. While it is still possible, the access is severely restricted and will take much longer to perform.
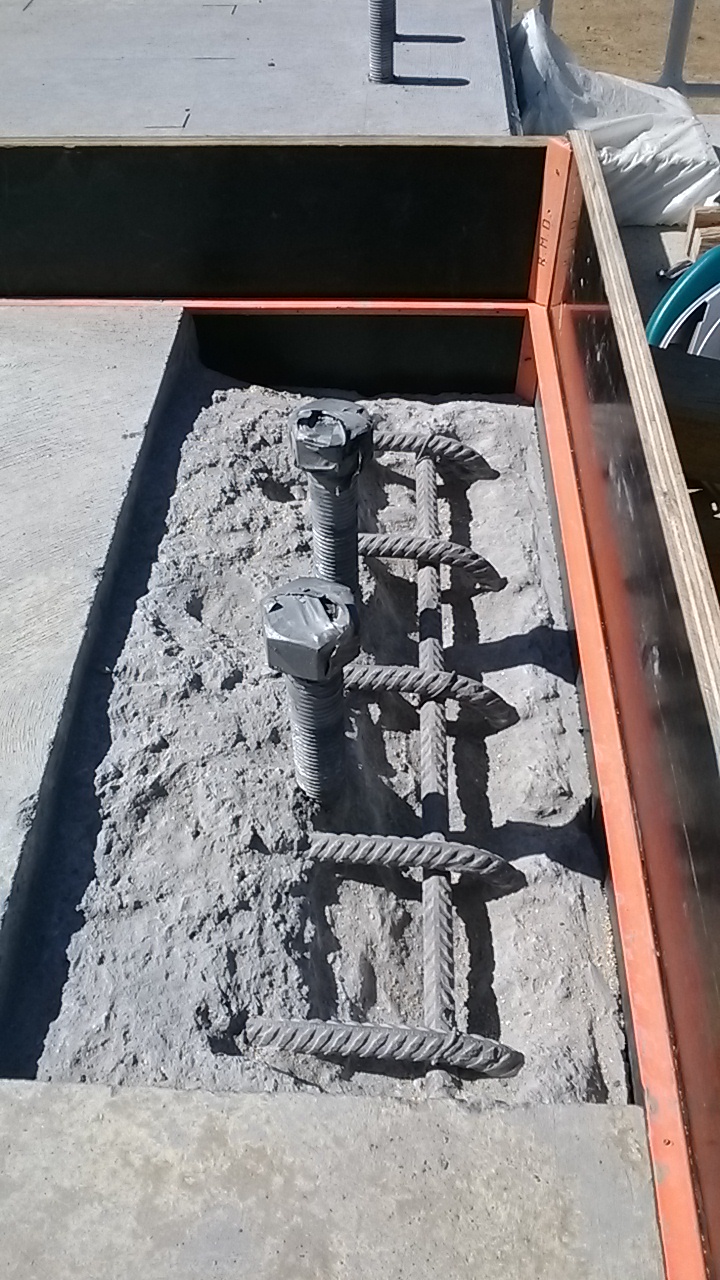
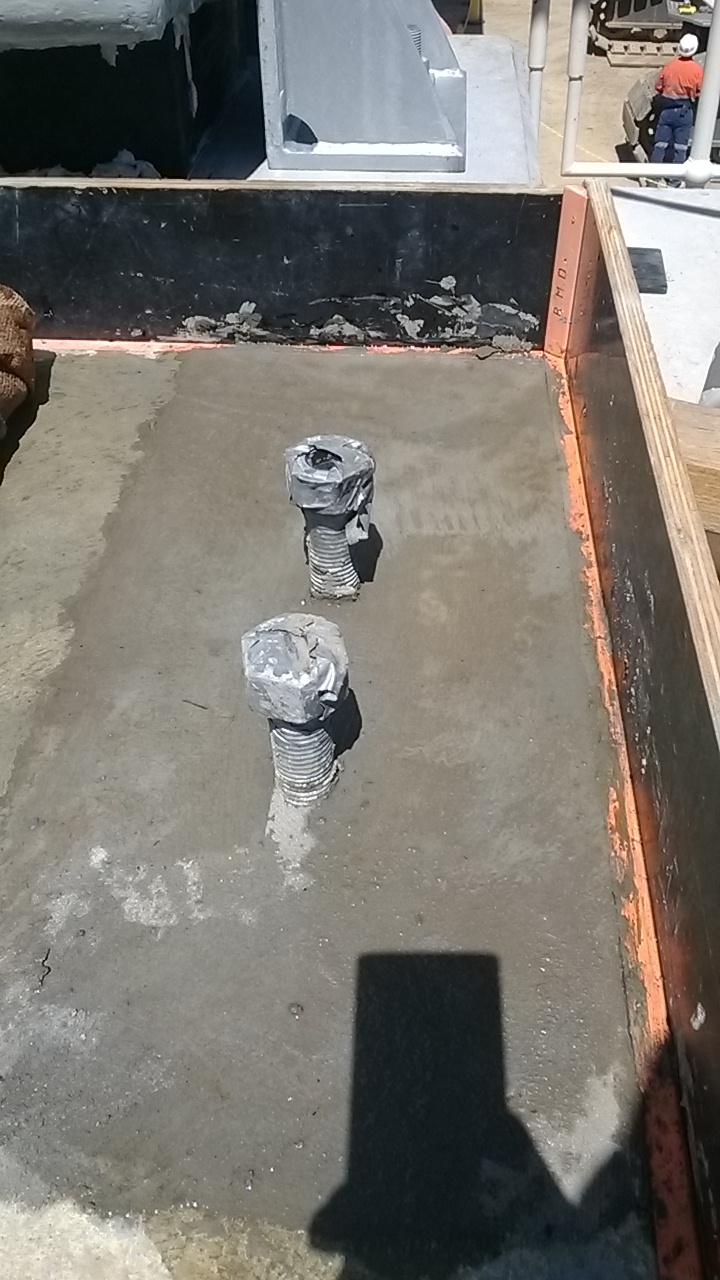
Back to the solution to the breakages. The concrete had to be cut out to a depth of 20mm and then broken out to expose the reinforcement. There needed to be sufficient room behind the bars to ensure that the aggregate flowed behind the bars and made a strong bond. See photo above for what it looked like after being formed up. After this the area was cleaned out and dampened (but no free water on the surface.The next stage was coating the steel and concrete in Nitobond AR. This is a 2 part epoxy that is designed for bonding fresh concrete to old concrete (or concrete that has already set). I did consider using other products such as Renderoc HB70, however the client preferred using a concrete patch for the aggregate component. The other side of the pedestal had no exposed reo and so a small bar of reo was chemset into the pedestal to provide a sound anchor for the new concrete. IT was a different 2 part epoxy used for this – Hiti have RE 500 which is very common, but expensive, we used Power fasteners PF PRO but there is also a chamset series of products by Ramset. The combination of the steel as an anchor and the nitobond should stop any problems of the repair falling out in the future – as due to a different batch of concrete being used there have been instances of repairs just falling out, with the differential thermal expansion of the two mixes.
The Other Problem
The issues with our own procedures not being followed have led to a different set of repairs. On the headstock the construction joints for the pedestals need to be prepared the day after the pour. To make the preparation of these joints easy we apply Rugasol (made by Sika) after the pour is finished, there are other equivalent products by Parchem, Ramset etc that could be used. Using this makes the greencutting the following day much easier and can give a very good clean construction joint. The rugasol should be worked into the area of the joint (it can be sprayed on, but this doesn’t work with the curing method we are using). If it is not worked in then when the damp hessian is placed ontop and flooded with water the Rugasol can spill out over the entire headstock. This has happened a couple of times, and while the impact isn’t dramatic it reduces the quality of finish on the surface. The inspectors have issued an NCR and stated that they want the surface dressed to achieve a class 2 finish – this is well within their rights as that is what is in the contract. They went a step further though (too far in my opinion) and have instructed us to coat the surface with Xypex Modified. This is a waterproofing sealant that is normally used in marine environments, reservoirs/dams and swimming pools. As there is no cracking or reduction in cover depth I think this is excessive, and can’t think of a reason for this being required for what was an aesthetic issue. Thankfully this is a one off problem. With more supervisors now on site the workmanship issues should disappear. (I planned to show some photos of this, but I’m on leave now and have left them back in Oz!)
